Showing posts with label DIY. Show all posts

Thursday, December 30, 2010

Homemade Stockings and Owl Ornament

More handmade Christmas from resurrected tshirts, yarn, and embroidery floss. This was my first time making stockings. My mom made us quite a few growing up. My very favorite being Snoopy. It was made of faux fur and had a floppy ear.
For fun, I thought I'd make mine different on each side so we can change it up from year to year. One side matches this years tree decor with bright colors. The other side is more Christmasy with just red, green, and white.


The tshirt I used for the toe and heal of the stockings is the same tshirt I used for this little owl. (Actually this shirt also made it onto the hoodie too.) I used 3 of the same yarns that we used on the other ornaments so they coordinate. He was completely hand stitched....and during the lunar eclipse non the less :). A fun little memory to go with him. And I have to admit....he is my favorite. He turned out just as cute as I had imagined him to be.


To 2010!

I hope everyone had a lovely holiday season and a happy, healthy year! May it continue!

Wednesday, December 29, 2010

Custom designed Hoodie

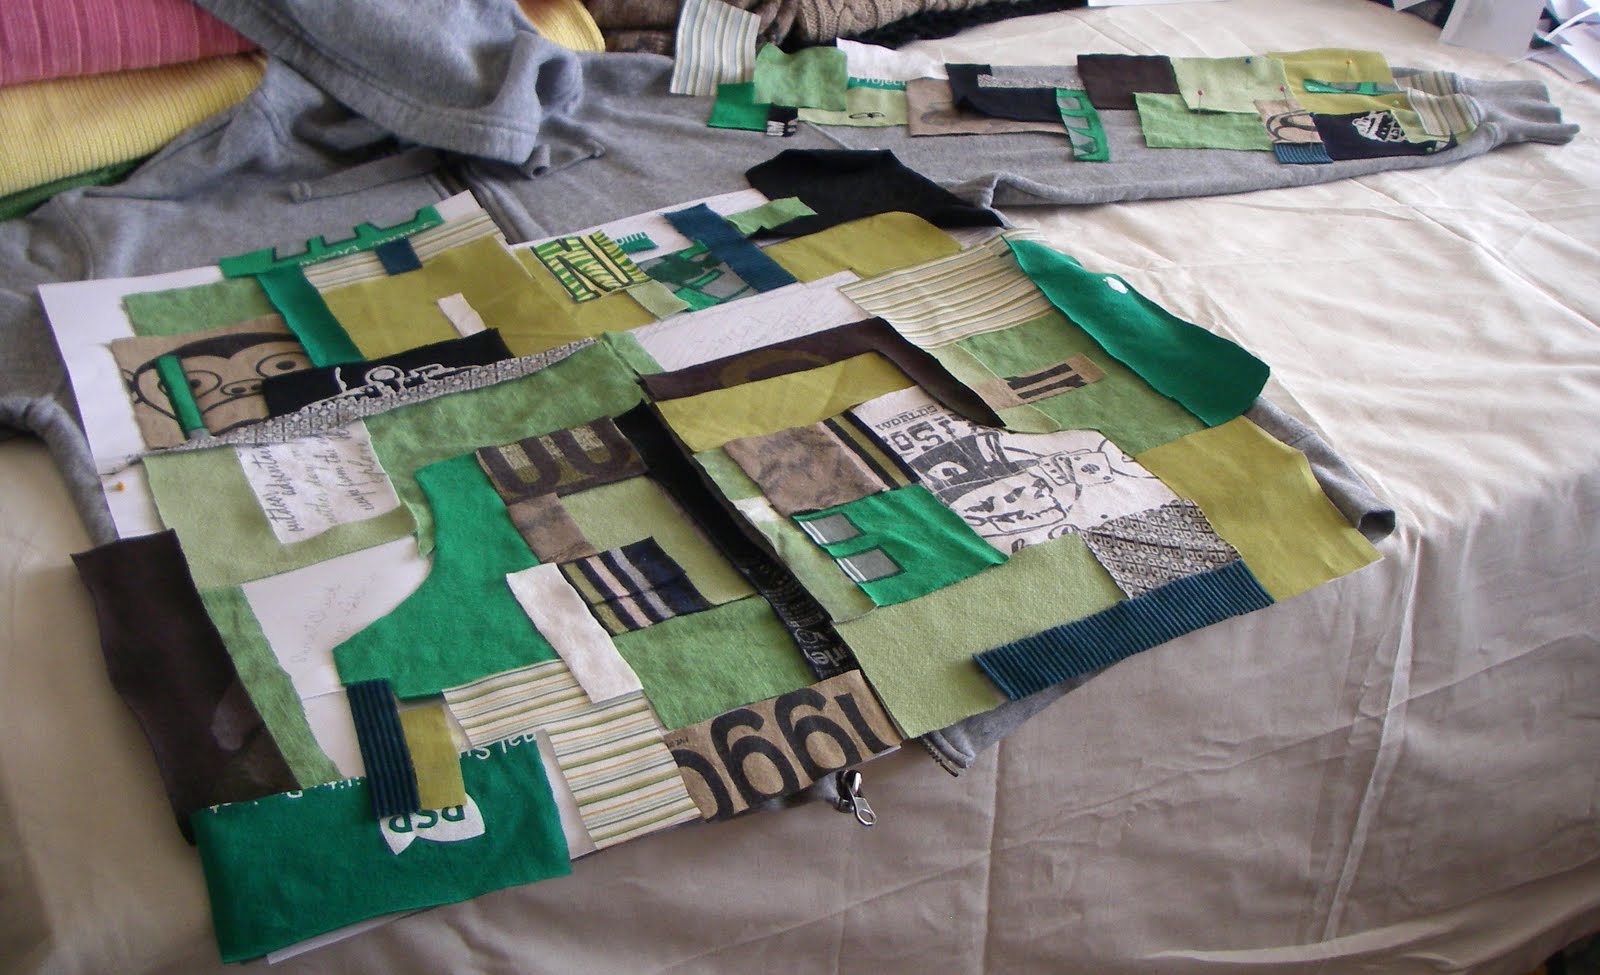
Last Christmas, I gave Nick an IOU to make him a custom hoodie. Maybe 9 mths ago, I presented him with some different designs and he choose this one. (Just thought I'd mention that it didn't take me 9mths to finish. I spent the last week before this Christmas on it.)

Primarily monochromatic.... green.
Geometric shapes.
Patch worked together.
Rough edges.
Not 'cute'

Going off my original sketch, I drew it to size. Then started piecing it all together until the puzzle was finished.


My thoughts are... the sleeves and pockets were a pain in the ass. And I went through 2 whole spoons of thread. Besides that, I think it turned out pretty well.

Nick's response... he loves it! Which makes me so relieved.

ok, now you can see how cute he looks in it :)


this is a silly one that i like =) im thinkin it's his Rocky impersonation.

Monday, December 27, 2010

Christmas Projects revealed

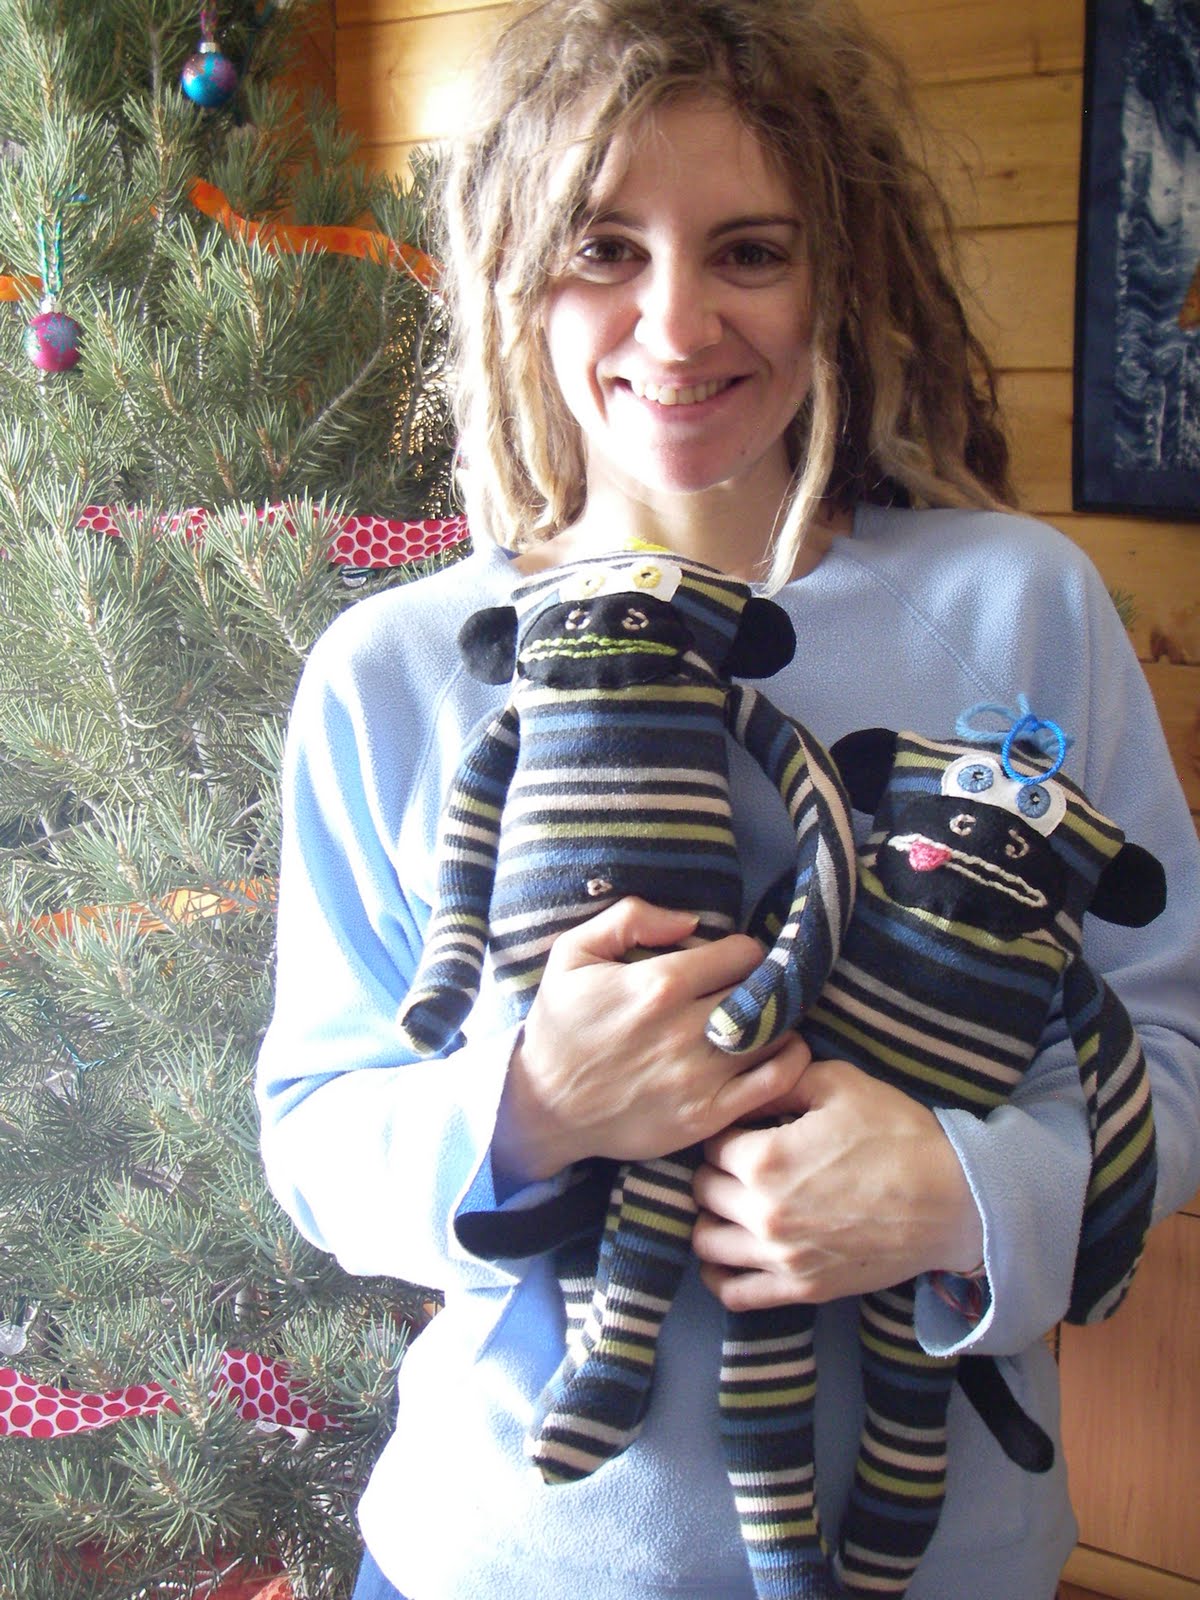
I have a few projects to share with you. I have been busy busy the last 2 weeks. My sewing machine has never gotten so much action before. For my nephews, I made sleeve monkeys. (the cousin to sock monkeys) I made Nick a custom designed hoodie and an ornament, plus a stocking for each of us.

SLEEVE MONKEYS


One of the sleeves. The material I cut off between their legs was used to make their arms.

Monkey pieces

body stuffed with balls of yarn. now i know that real stuffing looks a lot different.

hand-stitched eyes

monkey parts :)


Skinny body before it was stuffed.


Over-stuffed body. I opened him back up and took out some of the stuffing later...plus added a belly button :) and a little more rounded head.


Finished Yellow E monkey


Finished Blue A monkey


Butt tats


They turned out a little more "monster monkey" like... actually they remind me of a stuffed cow I had as a child. He had a tongue that stuck out too and I called him Cow Lick. :)

They other projects are coming up in separate posts.

Friday, November 12, 2010

Room Makeover

While I was looking for new renters, I stayed at my house and kept myself busy with projects. One of the more fun projects was making over one of my rooms. To me, it was my "playroom" which I used for crafts. This room was a baby's room before I bought it 6+ years ago and they had bug decals on the walls. I thought it was fitting for my playroom so I kept them up. My last renters used it for their little girls room and wanted me to keep the bugs up so I did. Well, this room was the only room I hadn't touched with a paint brush and I was itching to put a little me in it. So down came the bugs.


Before pics


Process

bug removal


pickin' colors

painting the brass light fixture

ug! Somebody painted over a wallpaper border. I tried to remove it, but it was a disaster because they put it directly on the sheet rock. good grief.


After Pics


Yay, pretty! It was hard to capture just how light and airy this room is now. I absolutely love it! I admit, I day dream about this being my own space again, but for now.......... I'm off to Tahoe again. We are currently on the road just leaving Canon City.

Wish us luck in finding an awesome place with my very own fun creative work space.

Wednesday, June 30, 2010

Busy Busy + DIY

I've been super busy this week getting ready for the next chapter of my life. I have been doing some design work, packing, sewing projects, and more. Thought I'd share an easy DIY for fixing holes in clothing. I received these blue pants in a big free bag of random things. I was happy to find that they fit me and are super cute and comfy. They did however have a rip in the crotch area so I busted out my trusty sewing kit and went to town.

A before picture showing the rip.


mended rip

Then I tried them on to take this picture and noticed a hole in one of the legs. It was big enough to put my finger through so I went about fixin' it a different way.

I cut a small piece of scrap fabric to be a patch for the hole. The fabric was fairly thin so I folded it in half to make it 2 ply thick. The patch was just a little bigger than the hole itself. I placed the patch on the inside of the pant leg and did a quick simple stitch around it once to hold it in place. I'm not familiar with stitch names, but from what I found on fiber-images.com, I think it's called a basting stitch.

Then I went around the whole hole a couple times with lots of overlapping stitches (aka 'overhand' stitches) until I was satisfied with that. Then I did the same thing again around the outer edge of the patch to slow down the fraying.

I'm leaving Tahoe today and heading to Camp Augusta tonight. Goodbye Tahoe, see ya later!